How To Sort Data In Excel Alphabetically And Numerically
Okay, here’s an HTML document explaining how to sort data in Excel alphabetically and numerically in about 1000 words, targeting a comprehensive understanding: “`html
Sorting Data in Excel: Alphabetically and Numerically
Microsoft Excel is a powerful tool for organizing and analyzing data. A fundamental aspect of data management is the ability to sort information, arranging it alphabetically or numerically to facilitate analysis, reporting, and decision-making. This guide will provide a comprehensive overview of how to sort data in Excel, covering both basic and advanced techniques for alphabetical and numerical sorting.
Understanding the Basics of Sorting
Before diving into specific methods, it’s important to understand the core principles of sorting in Excel. Sorting rearranges the rows in your worksheet based on the contents of one or more columns. It’s crucial to select the correct data range before sorting to avoid unintended consequences.
Selecting the Data Range
Proper data range selection is critical. Here’s how to do it:
- Sorting the Entire Worksheet: If you want to sort all columns based on the values in one or more columns, you typically don’t need to explicitly select the entire worksheet. Simply select a single cell within the dataset. Excel will usually automatically detect the contiguous data range, assuming there are no completely empty rows or columns within the dataset.
- Sorting a Specific Range: If you only want to sort a portion of your worksheet, or if you have unrelated data nearby, manually select the range you wish to sort. Click and drag your mouse to highlight the cells.
- Include Headers: Typically, you’ll want to include the header row (the row containing column titles) in your selection. Excel has an option to identify and exclude the header row from the sorting process.
The Sort Dialog Box
The main tool for sorting in Excel is the Sort dialog box. You can access it in several ways:
- Data Tab: Go to the “Data” tab on the Excel ribbon. In the “Sort & Filter” group, you’ll find the “Sort” button.
- Right-Click Menu: Select the data range you want to sort. Right-click within the selected range, and choose “Sort” from the context menu.
The Sort dialog box allows you to specify the column(s) you want to sort by, the sort order (ascending or descending), and other options.
Alphabetical Sorting (A to Z and Z to A)
Alphabetical sorting arranges text data in ascending order (A to Z) or descending order (Z to A). This is useful for organizing lists of names, addresses, product descriptions, and other text-based data.
Simple Alphabetical Sort
- Select the Data: Select the data range you want to sort, including the header row if applicable.
- Open the Sort Dialog Box: Go to the “Data” tab and click “Sort.”
- Choose the Sort Column: In the “Sort by” dropdown, select the column you want to sort alphabetically. This will be the column containing the text you want to order.
- Specify the Sort Order: In the “Order” dropdown, choose “A to Z” for ascending order or “Z to A” for descending order.
- Headers: Check “My data has headers” if you included the header row in your selection. If not, leave it unchecked, and Excel will use column letters (e.g., Column A, Column B) in the “Sort by” dropdown.
- Click OK: Click “OK” to apply the sort. Excel will rearrange the rows based on the alphabetical order of the selected column.
Sorting with Case Sensitivity (Advanced)
By default, Excel’s alphabetical sorting is not case-sensitive, meaning it treats uppercase and lowercase letters as the same. If you need a case-sensitive sort (e.g., to list “Apple” before “apple”), you can use a helper column with a formula.
- Insert a new column next to the column you want to sort case-sensitively.
- In the first cell of the new column (next to the first data cell), enter the formula: `=CODE(A1)` (replace `A1` with the actual cell reference). This formula returns the ASCII code of the first character in the cell.
- Drag the fill handle (the small square at the bottom-right of the cell) down to apply the formula to all rows in your data.
- Now, sort your data using the Sort dialog box, sorting by the new helper column in ascending order. This will effectively sort the data case-sensitively based on the ASCII values.
- After sorting, you can delete the helper column if you no longer need it.
Sorting by Multiple Columns Alphabetically
You can sort by multiple columns to create a more complex ordering. For example, you might want to sort a list of names first by last name and then by first name.
- Open the Sort Dialog Box: Go to the “Data” tab and click “Sort.”
- Choose the First Sort Column: In the “Sort by” dropdown, select the first column you want to sort by (e.g., “Last Name”). Specify the sort order (A to Z or Z to A).
- Add a Level: Click the “Add Level” button. This adds a new sorting criterion.
- Choose the Second Sort Column: In the “Then by” dropdown, select the second column you want to sort by (e.g., “First Name”). Specify the sort order (A to Z or Z to A).
- Add More Levels (If Needed): Repeat steps 3 and 4 to add more sorting levels if you have additional columns to consider. The order of the levels matters. The sorting happens in the order in which you add the levels.
- Click OK: Click “OK” to apply the sort.
Numerical Sorting (Smallest to Largest and Largest to Smallest)
Numerical sorting arranges numerical data in ascending order (smallest to largest) or descending order (largest to smallest). This is essential for organizing data such as sales figures, test scores, dates, and other numerical values.
Simple Numerical Sort
- Select the Data: Select the data range you want to sort, including the header row if applicable.
- Open the Sort Dialog Box: Go to the “Data” tab and click “Sort.”
- Choose the Sort Column: In the “Sort by” dropdown, select the column you want to sort numerically.
- Specify the Sort Order: In the “Order” dropdown, choose “Smallest to Largest” for ascending order or “Largest to Smallest” for descending order.
- Headers: Check “My data has headers” if you included the header row in your selection.
- Click OK: Click “OK” to apply the sort.
Sorting Dates
Excel recognizes dates as numerical values, allowing you to sort them chronologically. The process is the same as numerical sorting; just select the date column and choose “Oldest to Newest” (ascending) or “Newest to Oldest” (descending) in the “Order” dropdown.
Sorting Numbers Stored as Text
Sometimes, numbers in Excel are formatted as text, which can cause sorting issues. Excel will sort them as text strings, rather than as numbers. For example, “10” might be sorted before “2” because “1” comes before “2” alphabetically.
To fix this, you need to convert the text to numbers. Here are several ways to do this:
- Using the Error Indicator: If Excel detects numbers stored as text, it will often display a small green triangle in the upper-left corner of the cell. Select the cells with the error indicator, and click the warning icon that appears. Choose “Convert to Number” from the menu.
- Using Paste Special:
- Select an empty cell and enter the number 1.
- Copy the cell containing the number 1.
- Select the range of cells containing the numbers stored as text.
- Right-click and choose “Paste Special.”
- In the Paste Special dialog box, select “Multiply” under “Operation” and click “OK.” This multiplies each text value by 1, converting it to a number.
- Using the VALUE Function: Insert a new column next to the column with numbers stored as text. In the first cell of the new column, enter the formula `=VALUE(A1)` (replace `A1` with the actual cell reference). Drag the fill handle down to apply the formula to all rows. This formula converts the text value in A1 to a number. Then, copy and paste the values from the helper column back to the original column (using “Paste Values” to avoid pasting the formulas). You can then delete the helper column.
After converting the numbers to the correct format, you can sort them numerically as described above.
Sorting by Multiple Columns Numerically
Similar to alphabetical sorting, you can sort numerically by multiple columns. For example, you might want to sort a list of products first by price (largest to smallest) and then by quantity in stock (smallest to largest). Use the “Add Level” button in the Sort dialog box to add additional sorting criteria.
Custom Sorting
Excel also offers custom sorting options, allowing you to define your own sort order based on a specific list of values. This is useful when you have a column with categorical data (e.g., “Low,” “Medium,” “High”) that you want to sort in a specific, non-alphabetical order.
- Define a Custom List: Go to “File” > “Options” > “Advanced.” Scroll down to the “General” section and click “Edit Custom Lists…”.
- Create a New List: In the Custom Lists dialog box, click “NEW LIST.” In the “List entries” box, type your desired sort order, one item per line (e.g., Low, Medium, High).
- Add the List: Click “Add” to add the new list to the custom lists. Click “OK” to close the dialog boxes.
- Sort Using the Custom List: Select the data range you want to sort. Open the Sort dialog box.
- Choose the Sort Column: Select the column you want to sort using the custom list.
- Specify the Custom Order: In the “Order” dropdown, choose “Custom List…”.
- Select the Custom List: In the Custom Lists dialog box, select the custom list you created and click “OK”.
- Click OK: Click “OK” in the Sort dialog box to apply the sort.
Important Considerations
- Backup Your Data: Before sorting, especially with large or complex datasets, it’s always a good idea to back up your worksheet. This will allow you to revert to the original order if something goes wrong.
- Hidden Rows and Columns: Be aware that sorting affects hidden rows and columns. If you have hidden data, it will be rearranged along with the visible data. Un-hide the relevant rows and columns before sorting if you want to review their positions.
- Formulas: Sorting can affect formulas, especially those that refer to specific cell ranges. Make sure your formulas still work correctly after sorting. Use absolute cell references ($A$1) instead of relative cell references (A1) in your formulas if you want them to remain fixed regardless of sorting.
- Merged Cells: Sorting can cause problems with merged cells. Avoid sorting ranges that contain merged cells, or unmerge the cells before sorting and re-merge them afterward.
Conclusion
Sorting data is a fundamental skill for anyone working with Excel. By mastering the techniques outlined in this guide, you can effectively organize your data alphabetically and numerically, enabling you to analyze it more efficiently and make better-informed decisions. Remember to choose the correct data range, handle numbers stored as text appropriately, and consider the impact of sorting on formulas and other worksheet elements.
“`
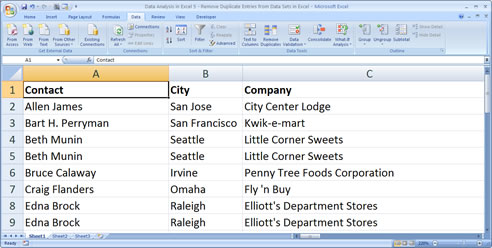 492×248 sort data alphabetically numerically excel from www.teachexcel.com
  288×303 sort data numerically alphabetically excel from www.extendoffice.com
  728×546 sort microsoft excel columns alphabetically steps from www.wikihow.com
 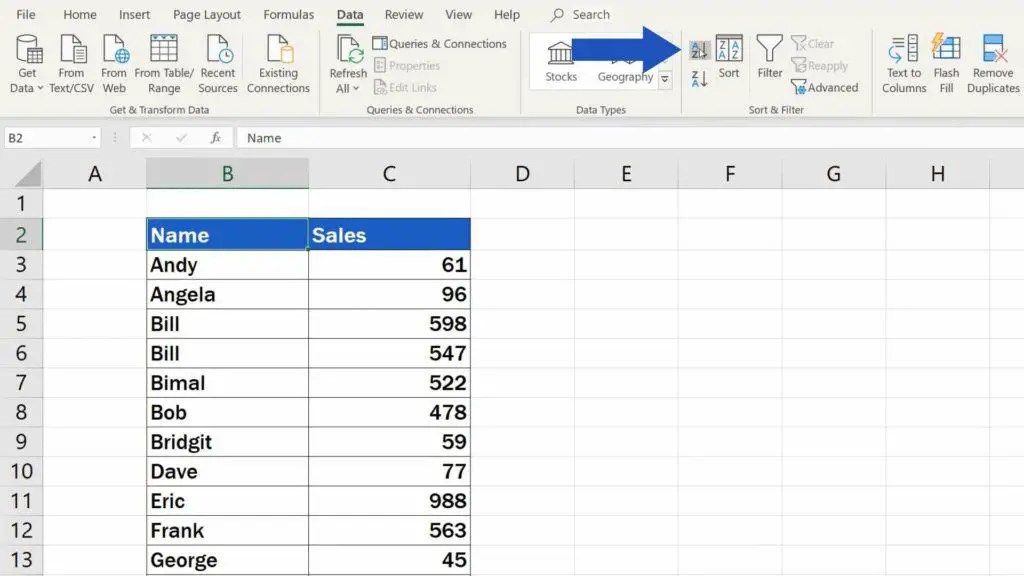 1024×576 sort alphabetically excel from www.easyclickacademy.com